Wood carving is one of those hands-on hobbies that’s both relaxing and surprisingly rewarding. Starting out, though, picking the right tools (affordably) can feel tricky. If you’re new to carving wood and looking for affordable kits that won’t break the bank, you’re in the right place. This post contains picks for beginner friendly carving kits, helpful advice, and a few tips on how to get started with confidence.

Budget Friendly Wood Carving Kits: What You Really Need
Wood carving has been around for centuries, ranging from traditional folk art to practical objects and even modern sculpture. For beginners, a decent carving kit can help you learn safely and enjoyably, without dropping too much cash right away. Most affordable kits bundle together just the basics, which is all you need to start shaping your first projects.
While you can buy professional level tools at specialty shops, starter kits from brands like BeaverCraft, Arteza, and Mikisyo are much easier on your wallet and pretty tough, too. These sets are perfect for whittling, relief carving, or making little decorative figures—all good practice for beginners.
A simple kit usually gives you a mix of blades, handles, and sometimes safety gear. Getting to know what each tool does before splurging on upgrades helps save money and avoids feeling overwhelmed by too many gadgets.
Get Started with Wood Carving: What’s Inside a Starter Kit?
Here’s what you’ll find in most beginner options:
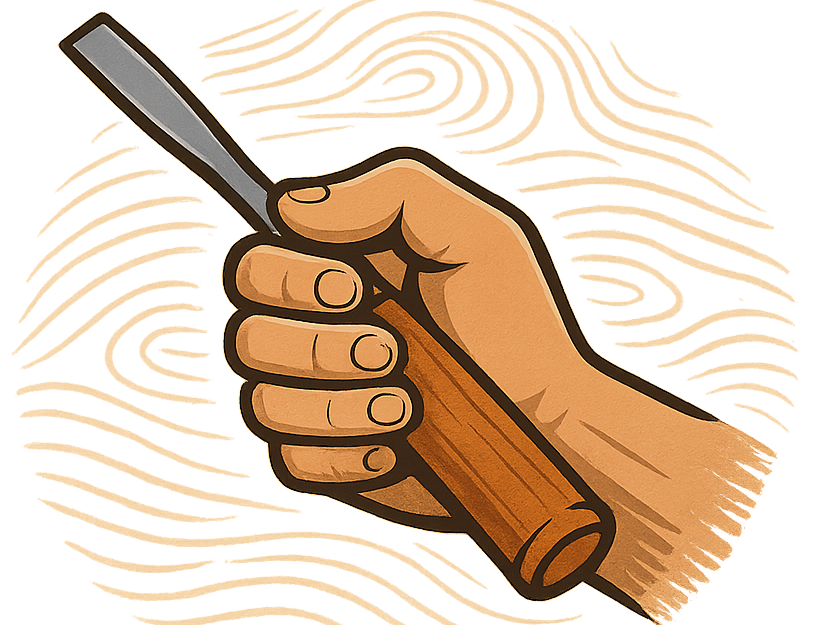
- Whittling Knife: Handy for carving down soft woods into basic shapes and forms.
- Detail Knife: Lets you do more precise cuts or smooth curves, ideal for making fine features.
- Gouge: A curved blade used for scooping out backgrounds or adding texture, a must have if you decide to pursue the hobby.
- Vtool: Helpful for incised lines or sharp edges, one of my favorite tools for basic relief carving.
- Sharpening Stone or Strop: Even cheap kits often throw in a small sharpening tool to keep your blades in good condition. A dull knife isn’t just frustrating—it’s more dangerous.
- Safety Gloves (sometimes included): Cut proof gloves give you a little protection while your hands get used to how the blades move.
- Practice Wood: Some kits tuck in a chunk or two of basswood, a soft, beginner friendly material that carves easily and doesn’t splinter much.
Remember, you don’t need dozens of tools to get started. A simple knife and gouge combo is more than enough for most new carvers to experiment with.
Simple Steps for Beginners: How to Use Your New Carving Kit
Unboxing your kit is pretty exciting, but taking a few simple steps will make sure you stay safe and get better results right away.
- Start Small: Go with small projects like a simple animal figure, egg, star, spoon, or a wood spirit face. Tiny objects let you practice different cuts and get a feel for how carving works.
- Practice Basic Cuts: Focus on straight cuts, stop cuts (which help control chipping), and gentle curves. YouTube channels like Doug Linker’s are great for following along with simple projects.
- Cut Away from Yourself: This tip is huge for preventing trips to get bandaged. Make sure you’re holding the wood securely and slicing away from your hands and body.
- Keep Your Tools Sharp: Dull blades are way more likely to slip. Give your knife a quick strop before each session; it only takes a minute but makes a big difference.
- Wear Gloves, At Least on Your Non-Dominant Hand: Grip gloves give you an extra layer of protection against small slips, especially when learning more detailed cuts.
Learning these basics makes more advanced skills easier and helps you work with more confidence. Mistakes happen, but that’s part of the process—each nick or bump teaches you something new.
What to Look for in Affordable Wood Carving Kits: Key Considerations
All carving kits aren’t created equal. Here’s where spending a few minutes on research really pays off:
- Blade Quality: Look for carbon steel or high carbon stainless blades. These types keep their edge longer and are easier to sharpen.
- Handle Comfort: Wood or rubberized handles are easier on your hands. Bulky plastic grips can get slippery or feel awkward after a while.
- Versatility: Kits with one or two types of knives along with a gouge or chisel are super practical for learning the basics. Many new carvers find that a simple detail knife and a gouge get the most use in their first year.
- Starter Wood Included: It’s more convenient to have a couple of soft basswood blocks in your kit. Otherwise, pick some up separately; avoid hardwoods, as they’re tough on beginner hands and tools.
- Price vs. Value: Some budget kits look great on paper but have low-quality metal that chips or dulls quickly. Checking real user reviews and sticking with kits in the $20–$40 range generally leads to a better first experience.
Brands like BeaverCraft, Morakniv, and Elemental Tools have been tested by lots of beginners and show up often in budget kit recommendations. Flexcut is another brand I have been using for a while, while possibly a bit more expensive I have found them sturdy and reliable, made from high carbon steel. If you are convinced this is the hobby for you this brand may be worth the extra cost. Buyers on popular retail sites share lots of real feedback, and it’s worth checking out video reviews to see what others have carved with each kit.
Common Beginner Challenges (and Easy Ways to Work Around Them)
Getting into wood carving is exciting, but there are a few snags nearly every newbie bumps into. Here’s a quick rundown of what to expect and some honest ways I’ve found to make things smoother:
- Blades Dulling Too Fast: Cheap steels or carving on hardwood can wear your blades out quickly. Regular sharpening or switching to basswood solves this for most people.
- Splintering or Rough Cuts: Using the wrong type of wood or forcing the blade rather than making slow, controlled slices is often the cause. Take your time, let the knife do the work and don’t be shy about using stop cuts.
- Hand Fatigue: Pushing too hard or gripping thin handles for long periods makes your hands cramp. Try taking more breaks or using palm sized handles for better comfort.
- Nicks & Small Cuts: These are pretty common at first. Always have a small first aid kit nearby, and try to keep your work steady on a nonslip or rubberized mat or towel, this simple trick helps quite a bit.
Keeping Blades Sharp
Even on a budget, taking care of your carving knives is the best way to get cleaner cuts and avoid frustration. Using a simple leather strop (or the sharpening tool from your kit), polish each blade before using it; just a few passes help keep the edge crisp without grinding down the metal too quickly.
Choosing the Right Wood
Basswood and pine are the safest bets for beginners. They cut smoothly, don’t chip much, and are easy on your knives. Personally, I carve a lot of projects from basswood. I Hardwoods like oak or maple are better left for advanced projects once you know the basics and have upgraded your tools.
Tips to Take Up a Notch Your Wood Carving Projects
Once you’re comfortable whittling and shaping, here are some ways to build on your skills:
Draw Your Design First: Use a pencil to sketch your pattern on the wood. This gives you a road map as you carve and stops you from cutting off too much. For larger relief carvings, consider drawing your design, tracing it on tracing paper, and transferring it to the wood using graphite or carbon paper under the tracing.
Slow Down Your Cuts: Rushing can ruin a project in seconds. Carving is about a chill, relaxing process, and most mistakes come from going too fast.
Finish with Sandpaper: Even beginners can make their creations look polished by smoothing rough edges with fine sandpaper after carving.
Stain or Paint: A little wood stain or acrylic paint makes even basic carvings pop, adding a nice finishing touch. Shaving artist pastels (chalks) and rubbing them into the wood are a nice way to bring some color to a carving as well.
Online carving communities like r/woodcarving on Reddit or beginner Facebook groups are full of tips, patterns, and support. Sharing progress pics and seeking advice can keep you motivated through the learning curve.
If you want to check out beginner patterns, websites like Woodcarving Illustrated or Instructables offer free guides. You might even stumble upon themed challenges to help you stick with your carving goals all year round.
Real World Uses for Simple Carving Kits
Basic carving kits aren’t just for practice; they’re great for making useful or decorative objects, even as a new artist. Here are a couple ideas:
- Simple Utensils: Small spoons or butter spreaders are easy starter projects and make fun gifts.
- Holiday Ornaments: Little animals, hearts, Santa faces or geometric shapes can be carved and hung up for all types of celebration.
- Keychains: Chunky little charms or tags for friends and family are always a hit.
- Relief Plaques: Even beginners can try shallow overviews of landscapes or shapes for display.
FAQ: Affordable Wood Carving Kits for Beginners
Question: What’s the best wood for starting out?
Answer: Basswood is hands down the best for beginners. It’s soft, easy to carve, and widely available in craft stores and online.
Question: Are cheap wood carving kits any good?
Answer: Many affordable kits work really well for starting out, especially sets from brands like BeaverCraft or Morakniv. Watch out for super low-priced kits with plastic handles or mystery steel; these wear out fast and can be unsafe.
Question: Do I need safety gloves?
Answer: Gloves on your nondominant hand help prevent cuts, especially when learning. They aren’t required, but they do add peace of mind and reduce little injuries.
Question: How do I know when to upgrade my kit?
Answer: If you start taking on tougher woods, bigger projects, or you wear down your first set after a few months, that’s a good time to invest in better blades or specialized tools.
Wrapping Up: Picking a Starter Kit You’ll Actually Use
Choosing an affordable wood carving kit is about sticking to the basics and building confidence little by little. Kits with one or two good knives, a gouge, and a touch of safety gear are all you need to try out this hobby. Aim for soft woods, keep your tools sharp, and keep your first projects simple. Over time, you’ll learn what you like best and can upgrade from there. Carving is super relaxing once you get going, and each new project is a chance to improve.